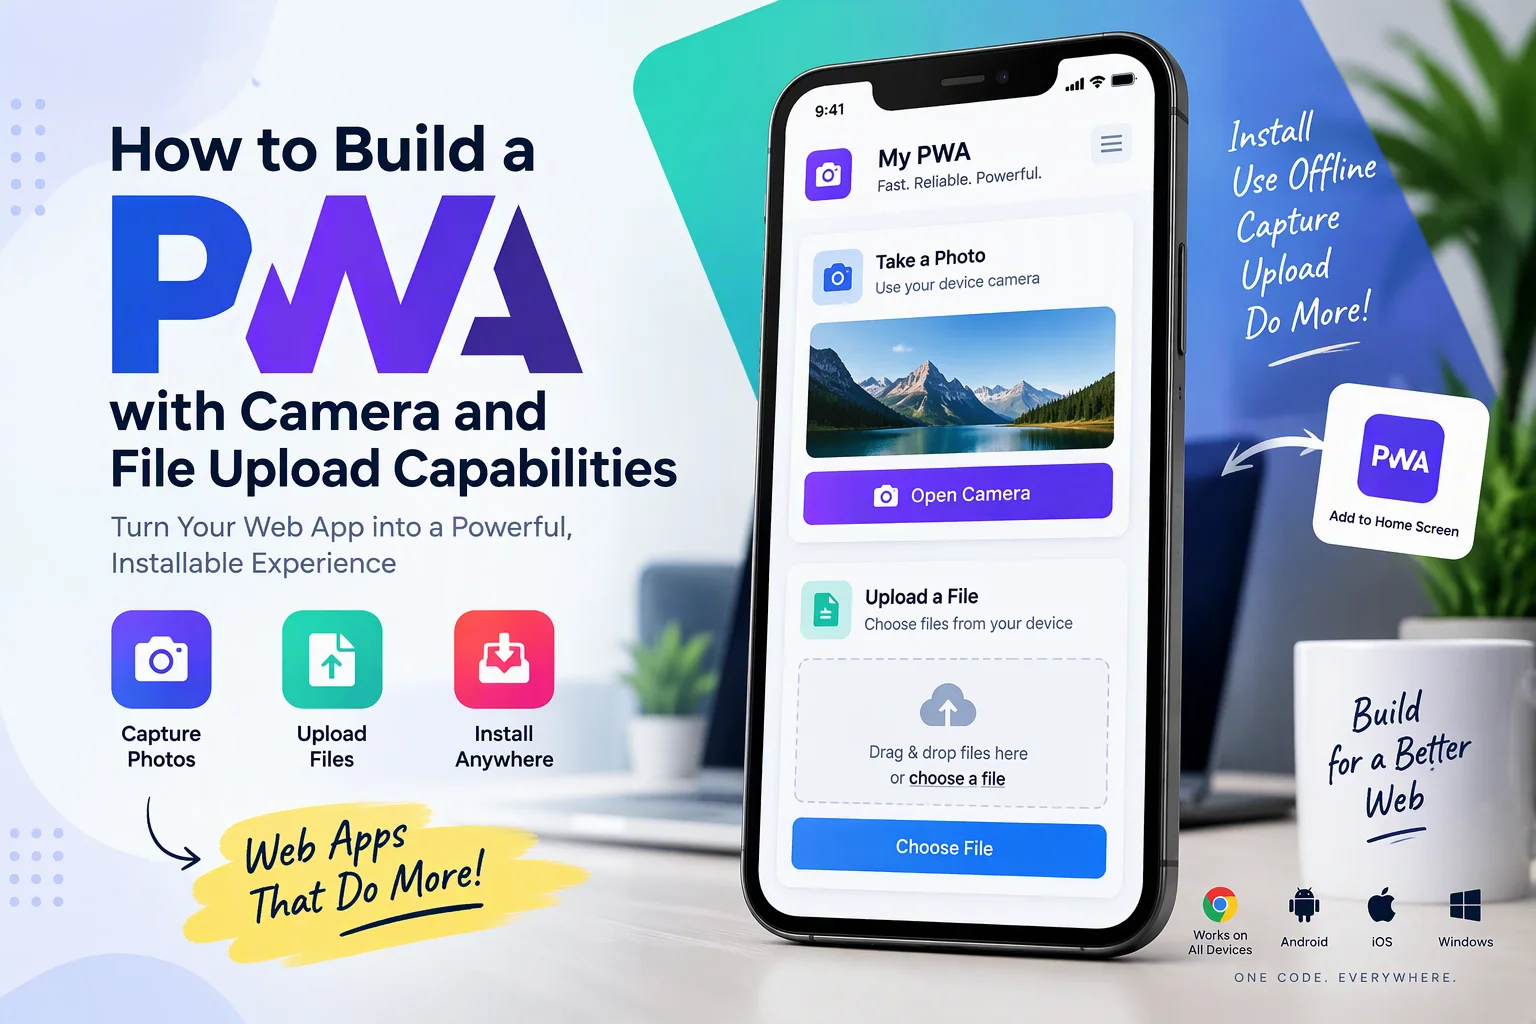
Progressive Web Apps (PWAs) allow businesses to deliver application-like experiences through web browsers without requiring users to install traditional mobile applications. By adding camera access and file upload capabilities, a PWA can support practical workflows such as document submission, identity verification, product photography, field inspections, and customer support.
For example, a field service employee can capture equipment photos, attach inspection documents, and submit a report directly through an installable web application. Similarly, customers can upload identity documents, receipts, and other files without downloading a separate app.
In this guide, we will explain how to build a PWA with camera and file upload capabilities, including the required technologies, architecture, implementation steps, security practices, testing, and development costs.
1. What Is a PWA with Camera and File Upload Capabilities?
A Progressive Web App with camera and file upload functionality is a web application that uses browser APIs to capture images and upload files from supported devices.
It combines standard PWA features with camera and file-handling capabilities.
The main technologies include:
- MediaDevices API: Accesses supported device cameras.
- File API: Reads information about selected files.
- HTML file input: Allows users to select images, documents, and other files.
- Canvas API: Processes or resizes captured images.
- Fetch API: Sends files to backend services.
- Service Workers: Support caching and selected background operations.
- Web App Manifest: Provides installation information.
These capabilities allow businesses to create applications that work across supported desktop and mobile browsers.
2. Identify the Main Features
Before development, define how users will capture images and upload files.
| Feature | Purpose |
|---|---|
| Camera access | Captures photos using supported device cameras |
| Camera selection | Switches between front and rear cameras where supported |
| Image preview | Displays captured photos before submission |
| File selection | Allows users to select files from their devices |
| Multiple uploads | Supports selecting multiple files |
| File validation | Checks file type and size |
| Image compression | Reduces image size before uploading |
| Upload progress | Displays upload status |
| Upload cancellation | Allows users to stop an ongoing upload |
| Offline upload queue | Stores pending uploads locally where appropriate |
| Secure storage | Protects uploaded business files |
| Upload history | Displays previously submitted files |
The required features depend on the application’s purpose. For example, a document verification platform may prioritize PDF uploads, while a field inspection application may focus on camera capture and image compression.
3. Choose the Technology Stack
Select technologies that support browser camera access, file processing, secure uploads, and backend storage.
| Layer | Recommended Technologies |
|---|---|
| Frontend | React, Next.js, Vue.js, or Angular |
| Programming language | JavaScript or TypeScript |
| UI framework | Tailwind CSS or Material UI |
| Camera access | MediaDevices API |
| File handling | HTML File API |
| Image processing | Canvas API or browser-based image libraries |
| PWA functionality | Web App Manifest and Service Workers |
| Backend | Node.js, Express.js, or NestJS |
| Database | PostgreSQL, MySQL, or MongoDB |
| File storage | Amazon S3, Google Cloud Storage, or Azure Blob Storage |
| API communication | REST API or GraphQL |
| Authentication | Secure sessions or OAuth 2.0 |
For larger applications, object storage is generally more suitable than storing uploaded files directly inside the main application database.
4. Design the PWA Architecture
A PWA with camera and file upload capabilities needs a frontend, browser APIs, backend upload service, file validation, and storage infrastructure.
A typical architecture looks like this:
          Mobile / Desktop Users
                    |
             Installable PWA
                    |
              Frontend UI
                    |
          Camera and File APIs
             /           \
       Camera Capture   File Selection
             \           /
              File Preview
                    |
              File Validation
                    |
              Upload Manager
                    |
              Backend API
                    |
             Authentication
                    |
             File Processing
                    |
             Object Storage
                    |
               Database
                    |
              Admin Panel
The frontend manages camera access and file selection. The backend validates incoming requests, processes uploads, and stores file metadata. The actual files are maintained in suitable storage infrastructure.
5. Create a Responsive PWA Interface
Start by building a responsive interface that works on mobile phones, tablets, and desktop computers.
The application may include:
- Dashboard.
- Camera capture screen.
- File selection screen.
- Image and document preview.
- Upload progress indicator.
- Uploaded file history.
- User profile and settings.
Use clear buttons for actions such as Capture Photo, Choose File, Upload, Retake, and Remove.
On mobile devices, camera controls should be touch-friendly. On desktop devices, users should be able to select files and access supported webcams.
6. Configure the Web App Manifest
The web app manifest provides information required by supported browsers to install and display the PWA.
Create a manifest.json file:
{
  "name": "Business File Upload App",
  "short_name": "FileUpload",
  "start_url": "/",
  "scope": "/",
  "display": "standalone",
  "background_color": "#ffffff",
  "theme_color": "#2457a7",
  "icons": [
    {
      "src": "/icons/icon-192.png",
      "sizes": "192x192",
      "type": "image/png"
    },
    {
      "src": "/icons/icon-512.png",
      "sizes": "512x512",
      "type": "image/png"
    }
  ]
}
Reference the manifest in the HTML document:
<link rel="manifest" href="/manifest.json">Serve the production application over HTTPS. Camera access and service worker functionality generally require a secure context, with localhost available for development.
7. Implement Camera Access Using the MediaDevices API
The MediaDevices API allows web applications to access supported cameras after obtaining user permission.
Use getUserMedia() to request camera access.
async function startCamera() {
  try {
    const stream = await navigator.mediaDevices.getUserMedia({
      video: {
        facingMode: "environment"
      },
      audio: false
    });

    const video = document.querySelector("#camera");

    video.srcObject = stream;
    await video.play();

  } catch (error) {
    console.error("Unable to access camera:", error);
  }
}
Add a video element to the page:
<video id="camera" autoplay playsinline></video>The facingMode option requests the rear-facing camera where available. If the requested camera is unavailable, the application should provide an appropriate fallback.
Also provide a way to stop the camera when the user leaves the capture screen:
function stopCamera() {
  const video = document.querySelector("#camera");

  if (video.srcObject) {
    video.srcObject.getTracks().forEach((track) => track.stop());
    video.srcObject = null;
  }
}
Stopping unused camera streams helps protect user privacy and avoids unnecessary device resource consumption.
8. Capture Images Using the Canvas API
After displaying the camera stream, users need a way to capture a photograph.
The Canvas API can convert the current video frame into an image.
function capturePhoto() {
  const video = document.querySelector("#camera");
  const canvas = document.createElement("canvas");

  canvas.width = video.videoWidth;
  canvas.height = video.videoHeight;

  const context = canvas.getContext("2d");

  context.drawImage(
    video,
    0,
    0,
    canvas.width,
    canvas.height
  );

  return new Promise((resolve) => {
    canvas.toBlob(
      (blob) => resolve(blob),
      "image/jpeg",
      0.85
    );
  });
}
The resulting Blob can be displayed as a preview or added to an upload request.
A complete application should also support retaking a photo, removing an image, and handling cases where camera permission is denied.
9. Allow Users to Select Files
Not every upload requires camera access. Users may already have documents, images, or videos saved on their devices.
HTML file inputs provide a straightforward way to select files.
<input
  type="file"
  id="fileUpload"
  accept="image/*,.pdf"
  multiple
/>
Read the selected files using JavaScript:
const fileInput = document.querySelector("#fileUpload");

fileInput.addEventListener("change", (event) => {
  const files = Array.from(event.target.files);

  files.forEach((file) => {
    console.log({
      name: file.name,
      type: file.type,
      size: file.size
    });
  });
});
The accept attribute helps guide file selection, but it does not provide security validation. The backend must independently verify every uploaded file.
10. Display Image and Document Previews
A preview helps users confirm that they selected the correct file before uploading it.
For images, use an object URL:
function previewImage(file) {
  const image = document.querySelector("#preview");

  const imageUrl = URL.createObjectURL(file);

  image.src = imageUrl;

  image.onload = () => {
    URL.revokeObjectURL(imageUrl);
  };
}
For supported document formats, the application can display a suitable preview or provide a download link.
Avoid rendering untrusted HTML or executing uploaded content in the application. Preview files using safe browser mechanisms and restrict supported formats according to business requirements.
11. Validate Files Before Uploading
File validation reduces unnecessary uploads and helps prevent unsupported content from reaching the backend.
Check the following:
- Maximum file size.
- Allowed file formats.
- MIME type.
- File extension.
- Number of selected files.
- Image dimensions where relevant.
Example frontend validation:
function validateFile(file) {
  const allowedTypes = [
    "image/jpeg",
    "image/png",
    "application/pdf"
  ];

  const maxSize = 10 * 1024 * 1024;

  if (!allowedTypes.includes(file.type)) {
    throw new Error("Unsupported file type");
  }

  if (file.size > maxSize) {
    throw new Error("File size exceeds 10 MB");
  }

  return true;
}
This example provides basic client-side validation. It must not replace server-side checks because file metadata and browser-provided MIME types can be manipulated.
12. Upload Files to the Backend
After capturing or selecting a file, send it to the backend using FormData.
async function uploadFile(file) {
  const formData = new FormData();

  formData.append("file", file);

  const response = await fetch("/api/uploads", {
    method: "POST",
    credentials: "include",
    body: formData
  });

  if (!response.ok) {
    throw new Error("File upload failed");
  }

  return response.json();
}
The backend should authenticate the user, validate the file, generate a safe storage name, and save the file in the configured storage system.
For large uploads, consider multipart or resumable upload mechanisms. These allow applications to handle interrupted connections more effectively.
13. Implement Upload Progress and Cancellation
Users should know whether their files are uploading, completed, or failed.
For applications requiring upload progress events, XMLHttpRequest provides a practical browser-based option.
function uploadWithProgress(file, onProgress) {
  return new Promise((resolve, reject) => {
    const formData = new FormData();

    formData.append("file", file);

    const xhr = new XMLHttpRequest();

    xhr.open("POST", "/api/uploads");
    xhr.withCredentials = true;

    xhr.upload.addEventListener("progress", (event) => {
      if (event.lengthComputable) {
        const percentage =
          Math.round((event.loaded / event.total) * 100);

        onProgress(percentage);
      }
    });

    xhr.onload = () => {
      if (xhr.status >= 200 && xhr.status < 300) {
        resolve(JSON.parse(xhr.responseText));
      } else {
        reject(new Error("Upload failed"));
      }
    };

    xhr.onerror = () => reject(new Error("Network error"));

    xhr.send(formData);
  });
}
A production implementation should also handle upload cancellation, timeouts, malformed responses, and retry behavior.
14. Add Offline Upload Queue Support
Users may capture photos or select documents when the device has no internet connection.
An offline upload queue allows the application to save eligible files locally and upload them later.
A practical workflow includes:
- Capture an image or select a document.
- Validate its format and size.
- Store the file Blob and metadata in IndexedDB.
- Mark the upload as pending.
- Detect network availability.
- Attempt synchronization when possible.
- Update the upload status after server confirmation.
A simplified IndexedDB structure using Dexie.js:
import Dexie from "dexie";

const db = new Dexie("BusinessUploadDB");

db.version(1).stores({
  uploads: "++id, fileName, status, createdAt"
});
Save an upload locally:
async function saveOfflineUpload(file) {
  await db.uploads.add({
    fileName: file.name,
    fileType: file.type,
    fileSize: file.size,
    fileBlob: file,
    status: "pending",
    createdAt: new Date().toISOString()
  });
}
The application can later retrieve pending records and upload them through the same backend API.
Do not assume that service workers can always access a page’s IndexedDB database or that background execution will happen immediately. Implement synchronization in the service worker where supported, alongside foreground and manual retry mechanisms.
15. Secure Uploaded Files and Camera Data
Camera images and uploaded documents may contain personal, financial, or business-sensitive information.
Security should be implemented on both the frontend and backend.
Important practices include:
- Require HTTPS for all application traffic.
- Request camera access only when necessary.
- Clearly explain why camera permission is required.
- Validate uploaded files on the server.
- Check actual file content instead of trusting file extensions.
- Generate random storage filenames.
- Restrict file size and upload frequency.
- Scan uploaded files for malware where appropriate.
- Store private files in protected object storage.
- Use authorization checks before allowing file access.
- Apply retention and deletion policies.
- Avoid exposing sensitive file URLs publicly.
For sensitive documents, use private storage with short-lived signed download URLs instead of permanently public links.
16. Test Camera and File Upload Functionality
Testing should cover different devices, browsers, file types, and network conditions.
| Testing Area | What to Verify |
|---|---|
| Camera access | Permission and camera initialization |
| Camera selection | Front and rear camera behavior |
| Image capture | Image quality and preview |
| File selection | Supported file formats |
| File validation | Size and type restrictions |
| Upload progress | Accurate progress indicators |
| Upload cancellation | Correct cancellation behavior |
| Offline uploads | Local storage and later synchronization |
| Network failures | Retry and recovery |
| Security | Unauthorized uploads and invalid file content |
| PWA installation | Installation on supported platforms |
| Responsive design | Camera and upload screens on different devices |
Test on real Android and iOS devices as well as desktop browsers. Camera access, file selection, and PWA installation behavior can differ across platforms.
17. Common Development Challenges
| Challenge | Recommended Solution |
|---|---|
| Camera permission denied | Explain permission requirements and offer file selection as an alternative |
| Rear camera unavailable | Provide camera selection or a fallback |
| Large image files | Resize or compress images where appropriate |
| Unsupported file formats | Validate formats before upload |
| Interrupted uploads | Use retry or resumable upload mechanisms |
| Offline file storage limits | Monitor browser storage and handle quota errors |
| Duplicate uploads | Use unique upload IDs and server-side idempotency |
| Sensitive file exposure | Use private storage and access controls |
| Browser differences | Test on actual target devices and browsers |
18. Estimate the Development Cost
Development cost depends on the application’s complexity, camera requirements, supported file formats, storage infrastructure, offline functionality, and security requirements.
| Development Scope | Estimated Cost (USD) |
|---|---|
| Basic PWA with file uploads | $3,000–$6,000 |
| PWA with camera capture and image previews | $5,000–$9,000 |
| Advanced PWA with multiple file types and offline upload queue | $9,000–$16,000 |
| Enterprise PWA with secure storage and advanced upload management | $16,000–$30,000+ |
These are indicative planning estimates, not verified market quotations. Actual costs depend on project scope, integrations, hosting, storage consumption, and ongoing maintenance.
19. Best Practices for Building a Reliable PWA
Follow these practices to deliver a secure and user-friendly application:
- Build the interface for mobile and desktop devices.
- Request camera permission only when users need it.
- Provide file selection as an alternative to camera capture.
- Display previews before uploading.
- Compress large images when appropriate.
- Validate files on both frontend and backend.
- Use secure object storage for uploaded files.
- Support upload progress and cancellation.
- Implement offline upload queues where required.
- Handle interrupted uploads and duplicate submissions.
- Test camera functionality on real devices.
- Monitor upload failures and storage usage.
Conclusion
Building a PWA with camera and file upload capabilities allows businesses to collect photos, documents, and other files directly through an installable web application. By combining the MediaDevices API, File API, Canvas API, IndexedDB, service workers, and secure backend storage, developers can create practical solutions for field inspections, document verification, customer onboarding, inventory management, and other business workflows.
The most effective approach is to develop camera capture and file selection first, implement secure uploads, and then introduce offline upload queues if the business requires them.
With the right architecture, a PWA can provide a flexible file collection experience across supported mobile and desktop devices without maintaining separate native applications.
Looking to build a PWA with camera and file upload capabilities? Dotcube Technologies can help design and develop a secure, responsive web application tailored to your business requirements.
Contact Dotcube Technologies: https://www.dotcubetechnologies.com/#contact