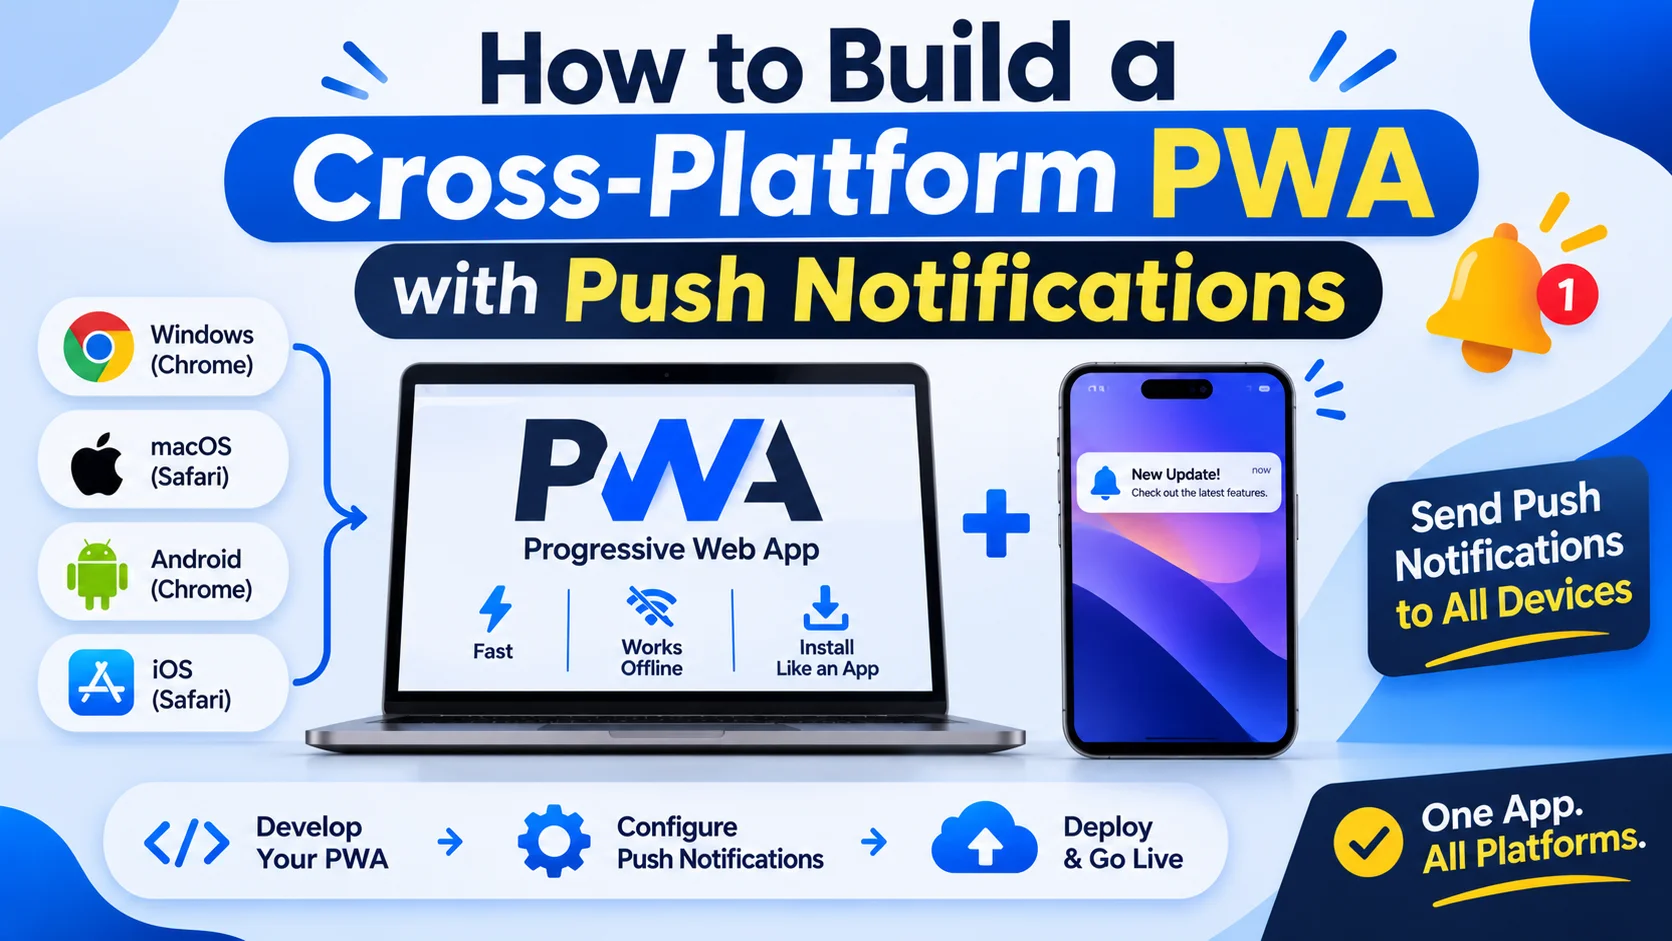
Progressive Web Apps (PWAs) allow businesses to deliver app-like experiences through web browsers without requiring users to download applications from an app store. By combining responsive design, service workers, offline capabilities, and push notifications, businesses can build applications that work across multiple devices and platforms.
A cross-platform PWA can reach users on desktop computers, Android devices, and supported iOS devices through a single web application. Push notifications make these applications more engaging by delivering timely updates about orders, appointments, offers, reminders, and important activities.
In this guide, we will explore how to build a cross-platform PWA with push notifications, including its architecture, essential technologies, implementation steps, challenges, and development costs.
1. What Is a Cross-Platform PWA with Push Notifications?
A cross-platform Progressive Web App is a web application designed to provide a consistent experience across different operating systems and devices. It uses modern web technologies to support installation, offline access, and selected native-like capabilities.
Push notifications allow the application to send messages to users even when they are not actively browsing the website, provided the platform and browser support the required notification capabilities.
For example, an e-commerce PWA can notify customers when:
- An order is confirmed or shipped.
- A product becomes available again.
- A payment is successfully processed.
- A promotional offer becomes active.
Unlike traditional mobile applications, a PWA can use one shared codebase for multiple platforms, reducing development and maintenance effort.
2. Key Features to Include
Before starting development, identify the features required for a reliable cross-platform PWA.
| Feature | Purpose |
|---|---|
| Responsive interface | Adapts to mobile, tablet, and desktop screens |
| Web app manifest | Provides installation information and app appearance |
| Service worker | Handles caching and background events |
| Push notifications | Delivers updates to subscribed users |
| Offline support | Provides access to selected cached content |
| Notification preferences | Lets users control notification categories |
| Authentication | Supports secure user accounts |
| Background synchronization | Helps process queued actions when connectivity returns |
| Notification history | Displays previously received updates |
| Analytics | Measures subscriptions, delivery, and engagement |
The feature set should match the application’s business requirements rather than adding unnecessary functionality.
3. Choose the Technology Stack
Selecting suitable technologies helps create a maintainable application that works across supported browsers and platforms.
| Layer | Recommended Technologies |
|---|---|
| Frontend | React, Next.js, Vue.js, or Angular |
| Programming language | JavaScript or TypeScript |
| Styling | CSS, Tailwind CSS, or Material UI |
| PWA functionality | Web App Manifest and Service Workers |
| Backend | Node.js, Express.js, or NestJS |
| Database | PostgreSQL, MySQL, or MongoDB |
| Push notifications | Web Push API and Firebase Cloud Messaging (FCM), where supported |
| Authentication | JWT, OAuth 2.0, or secure session-based authentication |
| Hosting | Vercel, AWS, Google Cloud, or Azure |
| Monitoring | Application logs and analytics tools |
The Web Push API and service workers provide the browser-based foundation for push notifications. Firebase Cloud Messaging can simplify parts of the notification infrastructure, but implementation details and platform support should be checked for the target browsers.
4. Plan the Cross-Platform PWA Architecture
A cross-platform PWA needs a frontend, service worker, backend, database, and push notification infrastructure.
A typical architecture looks like this:
       Mobile / Desktop Users
                 |
          Web Browser
                 |
          PWA Frontend
                 |
       Service Worker
          /          \
    App Caching    Push Events
                       |
                Push Service
                       |
                 User Device

          Backend Application
                 |
        Authentication Layer
                 |
             Database
                 |
       Notification Service
                 |
          Web Push / FCM
The frontend manages the user interface, while the service worker handles supported background operations. The backend manages business events, stores subscription details, and sends notifications through the appropriate push infrastructure.
5. Build a Responsive PWA Interface
Start by developing a responsive frontend that adjusts to different screen sizes.
The interface should provide:
- Mobile-friendly navigation.
- Readable typography and accessible controls.
- Touch-friendly buttons.
- Fast-loading pages.
- Consistent layouts across browsers.
- Clear notification permission settings.
Frameworks such as React and Next.js can help organize reusable components and application pages.
For example, an online booking PWA may include a dashboard, booking history, profile settings, and notification preferences.
Test the interface on different viewport sizes instead of assuming that a desktop layout will automatically work well on mobile devices.
6. Configure the Web App Manifest
The web app manifest contains metadata used by supported browsers when users install the PWA.
Create a manifest.json file:
{
  "name": "Business Notification App",
  "short_name": "NotifyApp",
  "start_url": "/",
  "display": "standalone",
  "background_color": "#ffffff",
  "theme_color": "#673ab7",
  "icons": [
    {
      "src": "/icons/icon-192.png",
      "sizes": "192x192",
      "type": "image/png"
    },
    {
      "src": "/icons/icon-512.png",
      "sizes": "512x512",
      "type": "image/png"
    }
  ]
}
Reference the manifest in the HTML document:
<link rel="manifest" href="/manifest.json">The manifest helps supported browsers recognize the application and provide an installation experience. Installation behavior and available options differ across platforms.
7. Implement Service Workers
A service worker is a JavaScript file that runs separately from the main browser page. It can manage caching, offline behavior, and push notification events.
Register the service worker from the frontend:
if ("serviceWorker" in navigator) {
  window.addEventListener("load", async () => {
    try {
      const registration =
        await navigator.serviceWorker.register("/service-worker.js");

      console.log("Service Worker registered:", registration.scope);
    } catch (error) {
      console.error("Service Worker registration failed:", error);
    }
  });
}
A basic service worker can listen for installation and activation events:
const CACHE_NAME = "pwa-cache-v1";

self.addEventListener("install", (event) => {
  event.waitUntil(
    caches.open(CACHE_NAME).then((cache) =>
      cache.addAll([
        "/",
        "/offline.html"
      ])
    )
  );
});

self.addEventListener("activate", (event) => {
  event.waitUntil(
    caches.keys().then((keys) =>
      Promise.all(
        keys
          .filter((key) => key !== CACHE_NAME)
          .map((key) => caches.delete(key))
      )
    )
  );
});
For production, use a deliberate caching strategy. Avoid caching sensitive account information or private API responses without appropriate security controls.
8. Request Push Notification Permission
Users must grant notification permission before a website can display browser notifications.
Permission should be requested after explaining the value of notifications, preferably following a meaningful user action.
async function requestNotificationPermission() {
  if (!("Notification" in window)) {
    return "unsupported";
  }

  const permission = await Notification.requestPermission();

  return permission;
}
Possible permission results include:
granted: The user has allowed notifications.denied: The user has blocked notifications.default: The user has not made a decision.
Do not repeatedly display permission prompts. If permission is denied, provide clear instructions for changing browser settings where applicable.
9. Subscribe Users to Push Notifications
After permission is granted, the application can create a push subscription using the browser’s Push API.
async function subscribeToPush(registration, publicKey) {
  const subscription = await registration.pushManager.subscribe({
    userVisibleOnly: true,
    applicationServerKey: publicKey
  });

  const response = await fetch("/api/push/subscribe", {
    method: "POST",
    headers: {
      "Content-Type": "application/json"
    },
    credentials: "include",
    body: JSON.stringify(subscription)
  });

  if (!response.ok) {
    throw new Error("Unable to save push subscription");
  }

  return subscription;
}
The publicKey represents the public VAPID key used by the Web Push implementation. The corresponding private key must remain securely stored on the server.
The backend should associate subscriptions with authenticated users when appropriate. It should also support subscription updates, expiration, and removal.
10. Send Push Notifications from the Backend
The backend is responsible for sending notifications when relevant business events occur.
For example, an order management platform may send a notification after an order is shipped.
A simplified Node.js implementation using the web-push package looks like this:
const webpush = require("web-push");

webpush.setVapidDetails(
  "mailto:admin@example.com",
  process.env.VAPID_PUBLIC_KEY,
  process.env.VAPID_PRIVATE_KEY
);

async function sendPushNotification(subscription, payload) {
  try {
    await webpush.sendNotification(
      subscription,
      JSON.stringify(payload)
    );
  } catch (error) {
    console.error("Push delivery failed:", error);

    if (error.statusCode === 404 || error.statusCode === 410) {
      // Remove the expired subscription from the database.
    }
  }
}
A notification payload might contain:
{
  "title": "Order Shipped",
  "body": "Your order is on its way.",
  "url": "/orders/123"
}
In a production system, notification sending should run through a queue or background worker. This prevents notification delivery problems from slowing down important business operations.
11. Display Notifications Through the Service Worker
The service worker receives push events and displays notifications.
self.addEventListener("push", (event) => {
  const data = event.data
    ? event.data.json()
    : {};

  const options = {
    body: data.body || "You have a new update.",
    icon: "/icons/icon-192.png",
    badge: "/icons/badge.png",
    data: {
      url: data.url || "/"
    }
  };

  event.waitUntil(
    self.registration.showNotification(
      data.title || "New Notification",
      options
    )
  );
});
Handle notification clicks so users can open the relevant application page:
self.addEventListener("notificationclick", (event) => {
  event.notification.close();

  const url = event.notification.data?.url || "/";

  event.waitUntil(
    clients.openWindow(url)
  );
});
For production, validate notification URLs and use safe navigation rules. Notification content should also avoid exposing sensitive personal information.
12. Handle Platform and Browser Differences
Cross-platform support is one of the most important parts of PWA development.
A PWA does not automatically behave identically on every operating system. Browser capabilities, installation requirements, notification permission flows, and background execution policies can differ.
| Platform | Important Considerations |
|---|---|
| Android | Supported browsers generally provide PWA installation and Web Push capabilities |
| iOS and iPadOS | Web Push is supported for eligible Home Screen web apps on supported versions; users must follow the platform’s installation and permission flow |
| Windows | Supported browsers can provide installation and notification capabilities |
| macOS | Browser and operating-system versions affect installation and notification behavior |
| Linux | Support depends on the browser and desktop notification environment |
Build a feature detection system instead of relying only on operating system names.
For example:
const capabilities = {
  serviceWorker: "serviceWorker" in navigator,
  push: "PushManager" in window,
  notifications: "Notification" in window
};

console.log(capabilities);
These checks identify basic browser APIs, but they do not guarantee that every notification workflow will work. Test actual installation, subscription, delivery, and click behavior on supported devices.
13. Create Notification Preferences and Subscription Management
Users should control which notifications they receive.
A notification settings page may include:
- Order and transaction updates.
- Appointment reminders.
- Account and security alerts.
- Promotional notifications.
- Product or service announcements.
Store these preferences in the backend and check them before sending notifications.
Also provide a way to unsubscribe or disable notifications. When a subscription becomes invalid, remove or deactivate it to avoid repeated delivery failures.
A basic subscription database could include:
| Field | Purpose |
|---|---|
| id | Unique subscription identifier |
| user_id | Associated user |
| endpoint | Push service endpoint |
| p256dh | Subscription encryption key |
| auth | Subscription authentication secret |
| platform | Device or platform information |
| created_at | Subscription creation time |
| updated_at | Last update time |
| is_active | Subscription status |
Subscription endpoints and encryption keys must be protected because they can be used to deliver messages to a user’s device.
14. Add Security and Privacy Controls
Push notification systems process device subscription information and sometimes user-related data. Security should be considered from the beginning.
Important practices include:
- Use HTTPS across the application.
- Keep VAPID private keys in secure server-side configuration.
- Authenticate subscription-management requests.
- Validate incoming subscription data.
- Encrypt sensitive data at rest where appropriate.
- Avoid including passwords, payment details, or confidential information in notification payloads.
- Provide notification consent and unsubscribe controls.
- Protect notification APIs against abuse and unauthorized access.
- Apply suitable rate limits.
- Follow applicable privacy and data protection requirements.
Push notifications should be useful, relevant, and sent according to user preferences.
15. Test the PWA Across Different Devices
Testing should cover both standard PWA functionality and notification delivery.
| Testing Area | What to Verify |
|---|---|
| Installation | PWA installation on supported platforms |
| Responsiveness | Mobile, tablet, and desktop layouts |
| Service worker | Registration, updates, and activation |
| Offline mode | Cached pages and offline fallback |
| Permission handling | Granted, denied, and default states |
| Push subscription | Subscription creation and updates |
| Notification delivery | Successful delivery and invalid endpoints |
| Notification clicks | Correct destination page |
| Security | Authentication and subscription protection |
| Performance | Loading speed and resource usage |
Use browser developer tools, automated tests, and real devices. Testing only through a desktop browser emulator is not sufficient for verifying platform-specific notification behavior.
16. Common Development Challenges
| Challenge | Recommended Solution |
|---|---|
| Different platform capabilities | Use feature detection and platform-specific testing |
| Users denying permission | Explain notification benefits before requesting permission |
| Expired subscriptions | Detect invalid endpoints and remove them |
| Duplicate notifications | Use event identifiers and idempotent processing |
| Service worker update issues | Implement versioned caching and controlled activation |
| Poor notification engagement | Send relevant, preference-based messages |
| Background execution restrictions | Use supported browser push mechanisms rather than relying on continuous background processes |
| Notification delivery failures | Add queues, retry policies, and monitoring |
Planning for these challenges early can reduce maintenance problems after launch.
17. Estimate the Development Cost
The cost of building a cross-platform PWA with push notifications depends on the feature set, UI complexity, backend infrastructure, integrations, security requirements, and testing scope.
| Development Scope | Estimated Cost (USD) |
|---|---|
| Basic PWA with installation support | $3,000–$6,000 |
| PWA with user authentication and backend | $6,000–$12,000 |
| PWA with push notifications and preferences | $8,000–$16,000 |
| Advanced cross-platform business PWA | $15,000–$30,000+ |
These are indicative planning ranges, not verified market quotes. Actual costs require a detailed project scope. Hosting, push infrastructure, ongoing maintenance, and third-party services may create additional expenses.
18. Best Practices for Building a Successful Cross-Platform PWA
Follow these practices to improve application quality and long-term reliability:
- Build a responsive interface from the beginning.
- Use a clear and valid web app manifest.
- Implement service workers with controlled caching strategies.
- Request notification permission at the right moment.
- Support user preferences and unsubscribe options.
- Handle expired subscriptions automatically.
- Use background queues for notification delivery.
- Test on real Android, iOS, Windows, and macOS devices where supported.
- Monitor delivery errors and user engagement.
- Keep notification messages short and useful.
Conclusion
Building a cross-platform PWA with push notifications requires more than creating a responsive website. It involves combining modern frontend technologies, service workers, a web app manifest, backend services, push subscriptions, and platform-specific testing.
With the right architecture, businesses can deliver installable web applications, communicate with users through timely notifications, and maintain a shared codebase across supported platforms.
The most effective approach is to develop the core PWA first, introduce push notification capabilities, and then test the complete experience across the browsers and devices used by the target audience.
Looking to build a cross-platform PWA with push notifications? Dotcube Technologies can help design and develop a secure, responsive Progressive Web App tailored to your business requirements.
Contact Dotcube Technologies: https://www.dotcubetechnologies.com/#contact