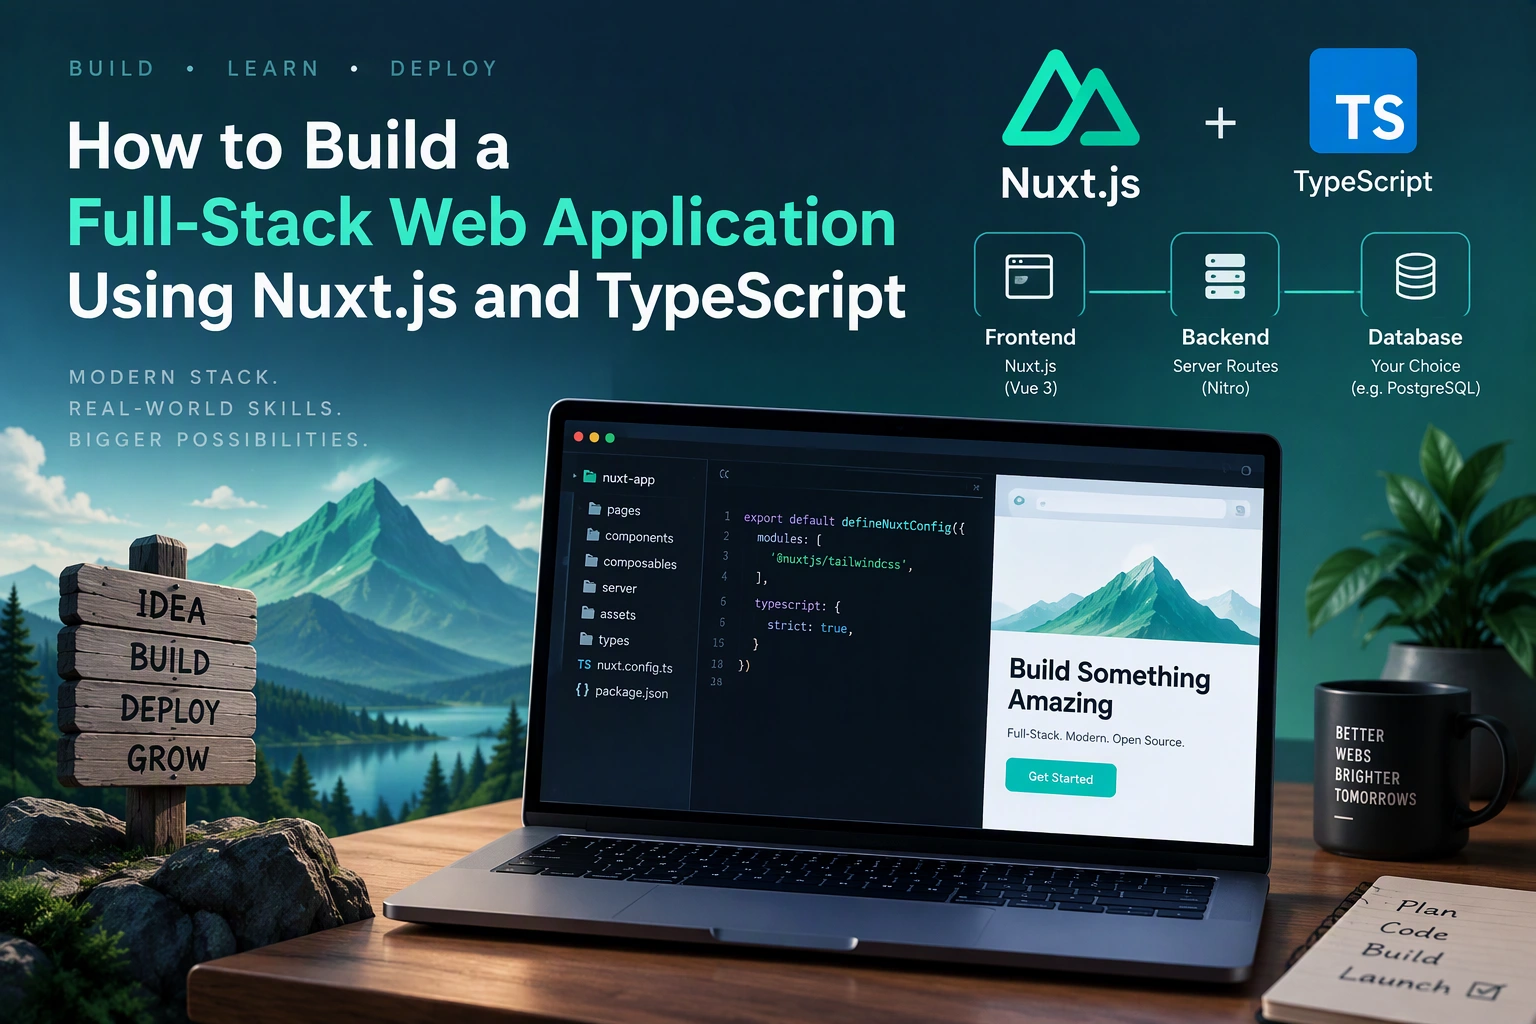
Building a full-stack web application requires a frontend interface, backend logic, database integration, authentication, and reliable application architecture. Managing these components separately can increase development complexity, especially when a project grows.
Nuxt.js and TypeScript provide a practical solution for developing modern full-stack web applications within a structured framework. Nuxt.js is built on Vue.js and supports server-side rendering, file-based routing, server APIs, and full-stack development. TypeScript adds static typing, making application code easier to maintain and less prone to common programming errors.
In this guide, we explain how to build a full-stack web application using Nuxt.js and TypeScript, covering project setup, architecture, database integration, authentication, API development, testing, deployment, and estimated costs.
1. Understand Nuxt.js and TypeScript
Before starting development, it is important to understand how both technologies contribute to the application.
What Is Nuxt.js?
<text> <Entity value=”Nuxt.js” category=”software” disambig=”Vue.js-based full-stack web framework” /> </text> is a framework built on Vue.js that provides tools for building server-rendered, static, and full-stack web applications.
Its major features include:
- File-based routing
- Server-side rendering (SSR)
- Static site generation
- Server API endpoints
- Automatic code splitting
- Data fetching utilities
- Middleware and route protection
- Built-in support for TypeScript
Nuxt allows developers to manage frontend and backend functionality within one project.
What Is TypeScript?
<Entity value=”TypeScript” category=”software” disambig=”Typed programming language built on JavaScript” /> extends JavaScript with static types.
It helps developers define the expected structure of variables, functions, API responses, and database records.
For example:
interface User {
  id: number;
  name: string;
  email: string;
  isActive: boolean;
}

const user: User = {
  id: 1,
  name: "John Smith",
  email: "john@example.com",
  isActive: true
};
TypeScript helps identify incorrect data structures during development instead of waiting for certain errors to appear at runtime.
2. Define the Application Requirements
Start by identifying what the application needs to accomplish.
For example, consider a customer management web application with the following features:
- User registration and login
- Dashboard
- Customer management
- Customer creation and editing
- Search and filtering
- User profile management
- Role-based access
- Database storage
- Responsive interface
Create a requirements document before writing code.
| Requirement | Description |
|---|---|
| Authentication | Registration, login, and logout |
| Dashboard | Display business information |
| Customer Management | Create, view, update, and delete records |
| Database | Store customer and user information |
| API | Connect frontend components with backend services |
| Authorization | Restrict access based on user roles |
| Responsive UI | Support desktop, tablet, and mobile |
| Reporting | Display useful business statistics |
Defining these requirements helps determine the database structure, API endpoints, and application architecture.
3. Set Up a Nuxt.js and TypeScript Project
The first development step is creating the Nuxt project.
Install a supported Node.js version, then create a new application:
npm create nuxt@latest business-appMove into the project directory:
cd business-appInstall the project dependencies:
npm installStart the development server:
npm run devNuxt projects support TypeScript through their standard project configuration. Developers can also add a tsconfig.json file when custom TypeScript configuration is required.
A basic project structure looks like this:
business-app/
│
├── app/
│   ├── assets/
│   ├── components/
│   ├── layouts/
│   ├── middleware/
│   ├── pages/
│   └── app.vue
│
├── server/
│   ├── api/
│   ├── middleware/
│   └── utils/
│
├── shared/
│   └── types/
│
├── public/
├── nuxt.config.ts
├── package.json
└── tsconfig.json
The exact structure can vary with the Nuxt version and project configuration.
4. Design the Full-Stack Application Architecture
A well-organized architecture separates user interface components, application logic, server APIs, and database operations.
A typical Nuxt.js application can follow this structure:
             User Browser
                  |
                  v
           Nuxt.js Frontend
                  |
        Pages, Components, Layouts
                  |
                  v
          Nuxt Server API
                  |
          Business Logic Layer
                  |
                  v
          Database Access Layer
                  |
                  v
              Database
The main responsibilities are:
| Layer | Responsibility |
|---|---|
| Frontend | Display pages and collect user input |
| Components | Reusable interface elements |
| Middleware | Handle navigation and access checks |
| Server API | Process HTTP requests |
| Business Logic | Apply application rules |
| Database Layer | Store and retrieve records |
| Database | Persist application information |
For larger applications, keep database operations and business logic in separate server-side modules rather than placing everything inside individual API route files.
5. Build the Frontend with Vue and Nuxt
Nuxt uses Vue components to build the application’s user interface.
Create a dashboard page inside the app/pages directory:
<!-- app/pages/dashboard.vue -->

<script setup lang="ts">
const title = "Business Dashboard";

const statistics = [
  { label: "Customers", value: 1250 },
  { label: "Orders", value: 340 },
  { label: "Revenue", value: "$24,500" }
];
</script>

<template>
  <main>
    <h1>{{ title }}</h1>

    <div class="dashboard-grid">
      <div
        v-for="item in statistics"
        :key="item.label"
        class="stat-card"
      >
        <h3>{{ item.label }}</h3>
        <p>{{ item.value }}</p>
      </div>
    </div>
  </main>
</template>
Nuxt automatically creates a route for this page:
/dashboardCreate reusable components for navigation menus, buttons, tables, forms, and dashboard cards.
This approach makes the frontend easier to update and maintain.
6. Implement File-Based Routing
Nuxt automatically generates routes based on files inside the pages directory.
For example:
| File | Generated Route |
|---|---|
pages/index.vue | / |
pages/dashboard.vue | /dashboard |
pages/customers/index.vue | /customers |
pages/customers/create.vue | /customers/create |
pages/customers/[id].vue | /customers/:id |
pages/settings.vue | /settings |
For navigation, use Nuxt’s NuxtLink component:
<template>
  <nav>
    <NuxtLink to="/">Home</NuxtLink>
    <NuxtLink to="/dashboard">Dashboard</NuxtLink>
    <NuxtLink to="/customers">Customers</NuxtLink>
    <NuxtLink to="/settings">Settings</NuxtLink>
  </nav>
</template>
For dynamic pages, Nuxt provides route parameters through useRoute().
<script setup lang="ts">
const route = useRoute();

const customerId = route.params.id;
</script>

<template>
  <h1>Customer ID: {{ customerId }}</h1>
</template>
7. Develop Backend APIs Using Nuxt Server Routes
Nuxt supports backend API development through its server directory.
Create a file:
server/api/customers/index.get.tsAdd the following code:
export default defineEventHandler(() => {
  return {
    success: true,
    customers: [
      {
        id: 1,
        name: "John Smith",
        email: "john@example.com"
      },
      {
        id: 2,
        name: "Sarah Lee",
        email: "sarah@example.com"
      }
    ]
  };
});
This creates an API endpoint:
GET /api/customersCreate another endpoint to add a customer:
// server/api/customers/index.post.ts

interface CustomerInput {
  name: string;
  email: string;
}

export default defineEventHandler(async (event) => {
  const body = await readBody<CustomerInput>(event);

  if (!body.name || !body.email) {
    throw createError({
      statusCode: 400,
      statusMessage: "Name and email are required"
    });
  }

  return {
    success: true,
    message: "Customer received",
    customer: body
  };
});
This example demonstrates request handling. A production endpoint should also validate input using a schema validation library, authenticate the requester, apply authorization rules, and save the record to a database.
8. Integrate a Database
A full-stack application needs a database to store users, customers, orders, and other business information.
Common database choices include:
| Database | Suitable Use |
|---|---|
| PostgreSQL | Structured business applications |
| MySQL | Customer and transaction management |
| MongoDB | Document-oriented data |
| SQLite | Lightweight applications and development |
| Supabase | Managed PostgreSQL with additional services |
For this example, PostgreSQL is a suitable option.
Developers can use Prisma ORM to manage database models and queries.
Install the dependencies:
npm install prisma @prisma/client
npx prisma init
Define a customer model in the Prisma schema:
model Customer {
  id        Int      @id @default(autoincrement())
  name      String
  email     String   @unique
  createdAt DateTime @default(now())
}
Run the database migration:
npx prisma migrate dev --name create_customerCreate a database client in a server-only utility module:
// server/utils/prisma.ts

import { PrismaClient } from "@prisma/client";

const globalForPrisma = globalThis as unknown as {
  prisma?: PrismaClient;
};

export const prisma =
  globalForPrisma.prisma ?? new PrismaClient();

if (process.env.NODE_ENV !== "production") {
  globalForPrisma.prisma = prisma;
}
Use this client inside the customer API:
// server/api/customers/index.get.ts

import { prisma } from "../../utils/prisma";

export default defineEventHandler(async () => {
  const customers = await prisma.customer.findMany({
    orderBy: {
      createdAt: "desc"
    }
  });

  return {
    success: true,
    data: customers
  };
});
Keep database credentials in server-side environment variables. Never expose database connection strings or private credentials through frontend configuration.
9. Implement User Authentication and Authorization
Authentication allows users to access their accounts securely.
A typical authentication system includes:
- User registration
- Login and logout
- Password hashing
- Session management
- Password recovery
- Email verification
- Role-based access control
For production applications, developers can use a maintained authentication solution or implement secure server-managed sessions.
A typical authentication flow looks like this:
User Submits Login Form
          |
          v
      Server API
          |
          v
   Validate Credentials
          |
          v
 Verify Hashed Password
          |
          v
 Create Secure Session
          |
          v
 Set Secure Session Cookie
          |
          v
   Open Dashboard
Important security practices include:
- Hash passwords using Argon2id or bcrypt.
- Use HTTPS.
- Configure cookies with
HttpOnly,Secure, and appropriateSameSitesettings. - Validate sessions on protected server endpoints.
- Apply authorization checks to sensitive operations.
- Implement login rate limiting.
- Protect state-changing requests against CSRF where applicable.
Nuxt route middleware can improve the user experience by redirecting unauthenticated users:
// app/middleware/auth.ts

export default defineNuxtRouteMiddleware(() => {
  const isAuthenticated = useState(
    "isAuthenticated",
    () => false
  );

  if (!isAuthenticated.value) {
    return navigateTo("/login");
  }
});
This is only a simplified navigation example. Real authentication must verify the server-managed session, and every protected backend endpoint must independently enforce access control.
10. Fetch API Data from the Frontend
Once backend APIs are available, frontend pages can retrieve and display database information.
Nuxt provides useFetch() for data fetching.
<script setup lang="ts">
interface Customer {
  id: number;
  name: string;
  email: string;
}

const {
  data,
  pending,
  error
} = await useFetch<Customer[]>("/api/customers", {
  transform: (response: any) => response.data
});
</script>

<template>
  <section>
    <h1>Customers</h1>

    <p v-if="pending">Loading customers...</p>

    <p v-else-if="error">
      Unable to load customer records.
    </p>

    <ul v-else>
      <li
        v-for="customer in data || []"
        :key="customer.id"
      >
        {{ customer.name }} - {{ customer.email }}
      </li>
    </ul>
  </section>
</template>
For production applications, define shared response types and validate external data at runtime. TypeScript types alone do not verify the actual data returned by an API.
11. Implement Form Validation and Error Handling
Forms are essential for registration, customer management, orders, and other business workflows.
Validation should happen on both the frontend and backend.
Frontend validation improves usability, while server-side validation protects the application from invalid or malicious requests.
For example:
interface CustomerForm {
  name: string;
  email: string;
}

function validateCustomer(
  customer: CustomerForm
): string[] {
  const errors: string[] = [];

  if (!customer.name.trim()) {
    errors.push("Name is required");
  }

  if (!customer.email.includes("@")) {
    errors.push("Enter a valid email");
  }

  return errors;
}
For more advanced validation, use a schema validation library such as Zod.
Also implement consistent error handling for:
- Invalid form data
- Duplicate records
- Database connection failures
- Expired sessions
- Unauthorized requests
- Server errors
Avoid exposing internal error details or database information to users.
12. Improve Application Performance with SSR and Caching
Nuxt supports multiple rendering strategies that can improve performance and user experience.
| Rendering Strategy | Suitable Use |
|---|---|
| Server-Side Rendering (SSR) | Dynamic pages and content requiring server rendering |
| Static Site Generation | Public pages with mostly static content |
| Client-Side Rendering | Highly interactive application sections |
| Hybrid Rendering | Applications with different rendering needs across routes |
Additional optimization techniques include:
- Lazy-load large components.
- Optimize images and fonts.
- Split large JavaScript bundles.
- Use CDN delivery for static assets.
- Cache suitable API responses.
- Avoid unnecessary database queries.
- Paginate large datasets.
- Monitor Core Web Vitals.
Choose rendering strategies according to the application’s data and user experience requirements.
13. Secure and Maintain the Application
Security should be considered throughout the development lifecycle.
Important measures include:
- Validate all incoming API data.
- Protect private server endpoints.
- Keep dependencies updated.
- Store secrets in environment variables.
- Configure appropriate security headers.
- Apply rate limiting to sensitive endpoints.
- Restrict database access.
- Maintain automated backups.
- Monitor application errors.
- Review access permissions regularly.
Nuxt server APIs should never trust frontend-only authorization checks. Sensitive operations must be validated on the server.
14. Test the Full-Stack Application
Testing helps identify problems before the application reaches production.
Different testing methods should cover the frontend, backend, database, and complete user workflows.
| Testing Type | Purpose |
|---|---|
| Unit Testing | Test individual functions and components |
| Component Testing | Verify UI behavior |
| API Testing | Validate backend endpoints |
| Integration Testing | Test database and service interactions |
| End-to-End Testing | Test complete user journeys |
| Security Testing | Identify common vulnerabilities |
| Performance Testing | Evaluate loading and response times |
Useful tools include:
- Vitest
- Vue Test Utils
- Playwright
- Cypress
- Postman
For example, an end-to-end test can verify that a user logs in, opens the customer page, creates a record, and sees the new customer in the list.
15. Deploy the Nuxt.js Application
Once development and testing are complete, prepare the application for production.
Build the project:
npm run buildNuxt supports deployment through different hosting providers and server environments.
Common options include:
- Vercel
- Netlify
- AWS
- Google Cloud
- Azure
- Node.js hosting
- Docker-based infrastructure
For a Node.js deployment, the production server can be started using the generated output:
node .output/server/index.mjsBefore deployment:
- Configure production environment variables.
- Connect the production database.
- Run database migrations using a controlled deployment process.
- Configure HTTPS and the domain.
- Test API endpoints.
- Verify authentication and authorization.
- Configure logs and error monitoring.
- Set up backups and rollback procedures.
Nuxt’s deployment preset and hosting requirements should be checked for the selected platform.
16. Recommended Technology Stack
The following stack is suitable for many modern Nuxt.js full-stack applications.
| Application Layer | Recommended Technology |
|---|---|
| Frontend Framework | Nuxt.js |
| Programming Language | TypeScript |
| UI Framework | Vue.js |
| Styling | Tailwind CSS |
| Backend | Nuxt Server API |
| Database | PostgreSQL |
| ORM | Prisma |
| Validation | Zod |
| Authentication | Secure session-based authentication |
| State Management | Nuxt useState or Pinia |
| Testing | Vitest and Playwright |
| Deployment | Vercel, AWS, or Docker |
| Monitoring | Sentry |
The final stack should be selected based on project requirements, team expertise, scalability, and integration needs.
17. Common Challenges and Their Solutions
| Development Challenge | Recommended Solution |
|---|---|
| Complex project structure | Use feature-based modules and reusable components |
| Type mismatches | Define shared TypeScript interfaces and schemas |
| Slow database queries | Add indexes and optimize queries |
| Authentication vulnerabilities | Use secure sessions and server-side authorization |
| Large frontend bundles | Apply lazy loading and code splitting |
| API validation errors | Use consistent runtime schema validation |
| Deployment problems | Automate builds and test production configuration |
| Difficult maintenance | Maintain documentation and automated tests |
18. Estimated Development Cost
The cost of building a full-stack web application using Nuxt.js and TypeScript depends on the number of features, integrations, user roles, database complexity, and deployment requirements.
| Project Type | Estimated Cost (USD) |
|---|---|
| Basic full-stack application | $3,000–$6,000 |
| Medium business web application | $6,000–$12,000 |
| Advanced application with authentication and integrations | $12,000–$25,000 |
| Enterprise full-stack platform | $25,000–$50,000+ |
These are illustrative planning estimates, not verified market averages or fixed quotations. Actual costs depend on project scope, development time, integrations, and infrastructure.
Conclusion
Building a full-stack web application using Nuxt.js and TypeScript provides a structured approach to developing modern web platforms. Nuxt supports frontend rendering, routing, and backend APIs, while TypeScript helps maintain consistent data structures and improves code reliability.
By combining these technologies with a suitable database, secure authentication, reusable components, testing, and automated deployment, businesses can develop scalable applications that are easier to maintain and extend.
The most important step is to establish a clear architecture before development begins. This helps prevent unnecessary complexity as the application grows.
Looking to build a custom full-stack web application using Nuxt.js and TypeScript? Dotcube Technologies can help design and develop secure, scalable web applications tailored to your business requirements.
Contact Dotcube Technologies: https://www.dotcubetechnologies.com/#contact