Finding a property used to involve newspaper advertisements, local brokers, phone calls, and physical visits.
Today, a real estate app can bring much of this process into one platform.
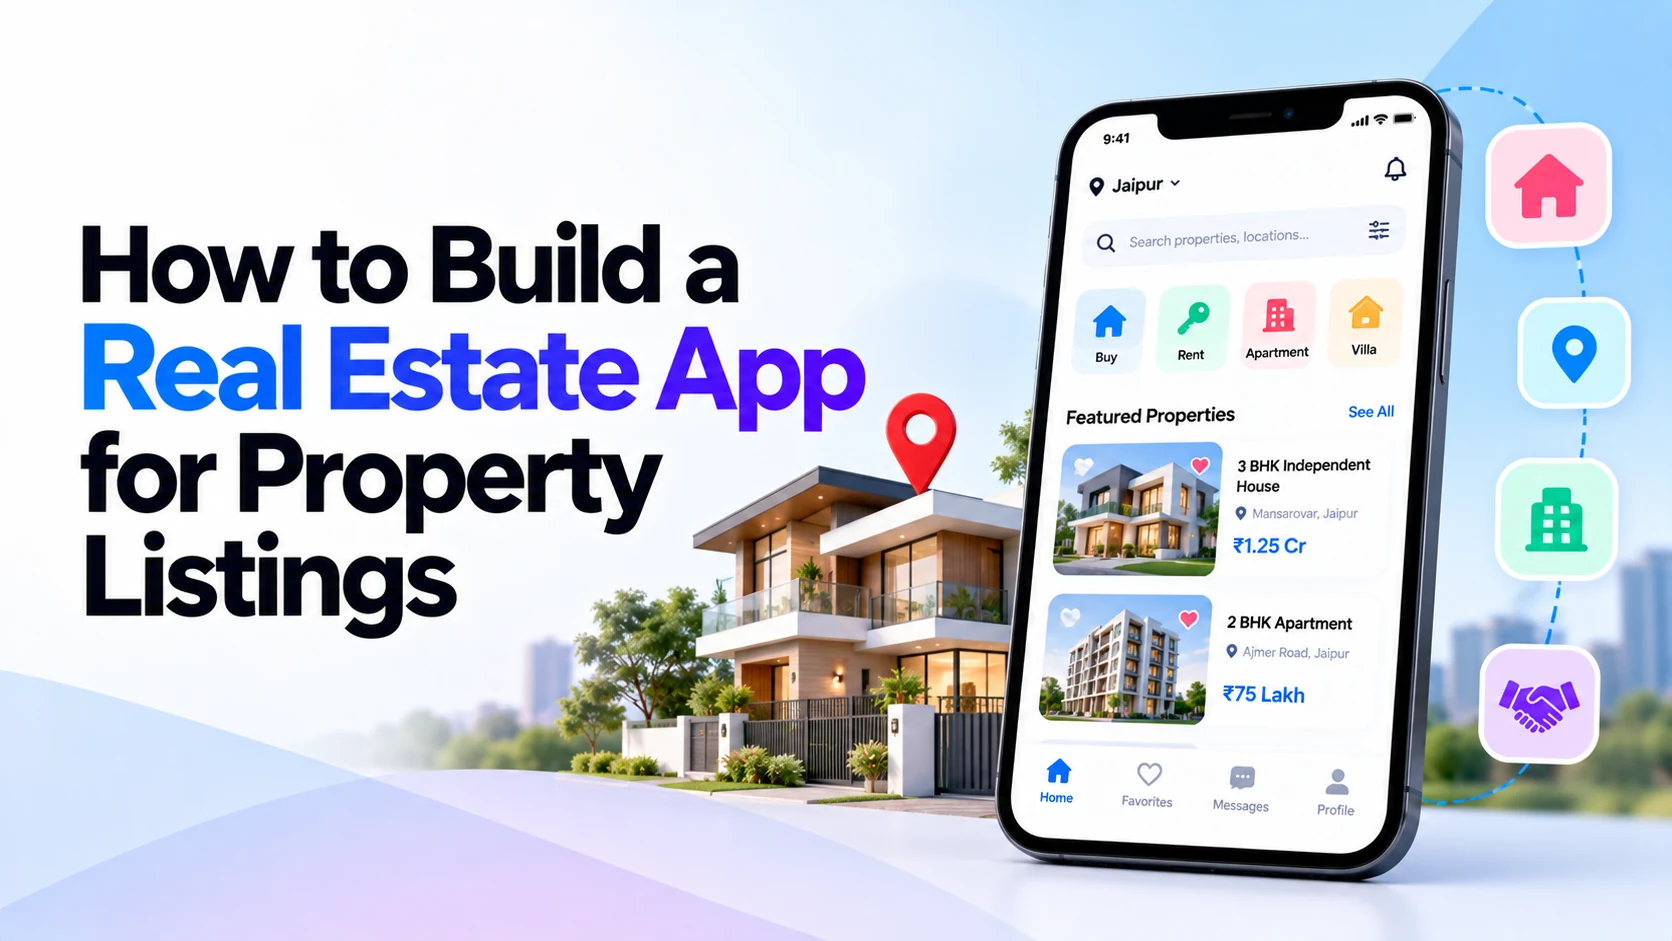
Users can search for properties, filter listings by location and budget, view photos, explore properties on a map, save favorites, contact agents or owners, and schedule property visits directly from their phones.
For property owners and agents, the same platform can provide tools for creating listings, uploading photos, managing inquiries, and tracking leads.
However, building a useful real estate app requires more than simply displaying property cards.
The platform needs a strong search system, detailed listings, map integration, user accounts, property management, communication tools, notifications, and a powerful admin dashboard.
This guide explains how to build a real estate app for property listings step by step.
What Is a Real Estate Property Listing App?
A real estate listing app is a mobile or web platform that connects people searching for properties with property owners, agents, brokers, builders, or real estate companies.
The basic process is simple:
Property Owner / Agent
        ↓
Creates Property Listing
        ↓
Listing Published
        ↓
Buyer or Tenant Searches
        ↓
Views Property
        ↓
Contacts Agent / Owner
        ↓
Schedules Property Visit
The platform can support properties for:
- Sale
- Rent
- Commercial use
- Residential use
- New projects
- Apartments
- Houses
- Villas
- Offices
- Shops
- Land
The exact categories depend on your target market.
Step 1: Decide What Type of Real Estate App You Want to Build
Before development starts, define the business model.
For example, you might build a platform for:
Property Buying and Selling
Owners and agents list properties for sale while buyers search and send inquiries.
Rental Properties
Users search for apartments, houses, rooms, or commercial spaces available for rent.
Real Estate Marketplace
Owners, agents, builders, buyers, and tenants all use the same platform.
Property Management
Landlords manage properties, tenants, rent, maintenance requests, and documents.
Real Estate Agency
A real estate company lists and manages only its own available properties.
Each model requires different features.
Therefore, deciding the business model first can prevent unnecessary development later.
Step 2: Identify Your Users
A property marketplace usually has several user roles.
Buyers and Tenants
They may need to:
- Search properties
- Apply filters
- View photos and videos
- Check property locations
- Save favorites
- Contact agents
- Schedule visits
- Receive property alerts
Property Owners
Owners may need to:
- Create listings
- Upload photos
- Add property details
- Set rent or sale price
- Manage inquiries
- Update listings
- Mark properties as sold or rented
Real Estate Agents
Agents may need:
- Agent profile
- Property management
- Lead management
- Customer inquiries
- Visit scheduling
- Messaging
- Performance information
Administrators
Administrators control the overall marketplace.
They may manage:
- Users
- Agents
- Properties
- Listings
- Categories
- Reports
- Payments
- Subscriptions
- Notifications
- App settings
Defining these roles early makes backend permissions much easier to design.
Step 3: Build User Registration and Login
Users need a simple way to create an account.
You might support:
- Email registration
- Mobile number
- OTP login
- Supported social login options
After registration, users can create their profile.
For example:
User Profile
│
├── Name
├── Contact Information
├── Saved Properties
├── Saved Searches
├── Property Inquiries
└── Scheduled Visits
Owners and agents may require additional profile information.
Step 4: Create Property Listings
Property listings are the heart of a real estate application.
Each listing should provide enough information for users to understand the property before contacting the owner or agent.
A listing may include:
- Property title
- Description
- Property type
- Sale or rent
- Price
- Location
- Bedrooms
- Bathrooms
- Property size
- Furnishing status
- Amenities
- Parking
- Photos
- Videos
- Floor plan
- Availability
- Agent or owner information
For example:
3 BHK Apartment

Location: Jaipur

For Sale

Price: ₹85 Lakh

Bedrooms: 3

Bathrooms: 2

Area: 1,650 sq. ft.

Parking: Available
Clear information improves the property discovery experience.
Step 5: Add Property Photos and Videos
Real estate is highly visual.
Users usually want to see a property before contacting anyone.
Allow owners or agents to upload multiple property photos.
You can also support:
- Property videos
- Floor plans
- 360-degree images
- Virtual tours
Images should be compressed and optimized before delivery.
Otherwise, large property photos can make the application unnecessarily slow.
Cloud storage and a content delivery system can help when the platform grows.
Step 6: Build Powerful Property Search
Search is one of the most important parts of a property app.
A user might search:
Apartments for sale in Jaipur
or:
2 BHK apartment for rent near my preferred area
The platform should return relevant properties quickly.
Users should also be able to refine those results.
Step 7: Add Advanced Property Filters
Property requirements vary significantly between users.
Useful filters can include:
Location

Buy / Rent

Property Type

Minimum Price

Maximum Price

Bedrooms

Bathrooms

Property Size

Furnished / Unfurnished

Amenities
Advanced platforms may also support filters such as:
- Parking
- New construction
- Ready to move
- Property age
- Floor
- Facing
- Verified properties
Filters should remain simple enough that users can quickly adjust them.
Step 8: Add Map-Based Property Search
Maps are extremely useful in real estate applications.
Instead of seeing only a list, users can explore available properties geographically.
For example:
Map
│
├── Property A — ₹45L
├── Property B — ₹60L
├── Property C — ₹72L
└── Property D — ₹90L
When the user moves the map, the application can load listings in that area.
Map integration can also help users understand how close a property is to important places.
Depending on available data and integrations, you might display nearby:
- Schools
- Hospitals
- Public transport
- Shopping areas
- Offices
- Parks
Location data should be handled carefully and accurately.
Step 9: Create the Property Details Page
When users select a listing, they should reach a detailed property page.
A useful structure might be:
Property Photos

Property Name

Price

Location

Property Details

Amenities

Description

Map

Agent / Owner Information

Schedule Visit

Contact
Important information should be visible without making the page overwhelming.
Step 10: Add Favorites
Users rarely choose a property after viewing only one listing.
Allow them to save properties.
For example:
My Favorites

Apartment A

Villa B

House C
Users can return later and continue their search.
This also makes the app more useful for longer property searches.
Step 11: Add Saved Searches and Property Alerts
Favorites save individual properties.
Saved searches preserve search criteria.
For example:
Saved Search

Location: Jaipur

Property: Apartment

Bedrooms: 3

Budget: ₹50L – ₹80L
When a matching property is added, the system can notify the user.
Alerts might include:
New property matching your saved search.
or:
Price changed for a property in your favorites.
This can encourage users to return to the platform.
Step 12: Allow Owners and Agents to Add Properties
A marketplace needs an easy listing creation process.
The flow could look like:
Add Property
      ↓
Select Property Type
      ↓
Enter Location
      ↓
Enter Property Details
      ↓
Set Price
      ↓
Upload Photos
      ↓
Preview
      ↓
Submit Listing
Keep the form organized into manageable steps.
Very long property forms can discourage users from completing a listing.
Step 13: Add Listing Verification
Fake or misleading listings can quickly damage trust in a real estate platform.
Consider a verification workflow.
For example:
Listing Submitted
      ↓
Automated Checks
      ↓
Admin Review if Required
      ↓
Approved
      ↓
Published
Verification might check:
- Required information
- Duplicate listings
- Invalid images
- Suspicious pricing
- Agent details
Depending on your business model, verified listings can receive a visible verification indicator.
However, the meaning of “verified” should be clearly defined for users.
Step 14: Add Agent Profiles
Professional agents can have dedicated profiles.
An agent profile may include:
- Name
- Profile photo
- Agency
- Service area
- Active listings
- Contact options
- Professional information
Users can then view all properties represented by the agent.
Step 15: Add Chat or Messaging
Users often want to ask questions before scheduling a visit.
An in-app messaging system can connect buyers or tenants with agents.
For example:
Buyer
   ↓
Property Inquiry
   ↓
Agent
   ↓
Chat
   ↓
Schedule Visit
Messages can remain associated with the relevant property so both parties know which listing they are discussing.
Step 16: Add Call and Contact Options
Not every user wants to use chat.
Provide simple contact options where appropriate.
For example:
Contact Agent

Call

Message

Schedule Visit
If phone numbers are sensitive or part of a paid business model, you can control when contact details become visible.
Step 17: Add Property Visit Scheduling
Users should be able to request property visits.
A simple flow might be:
Property
    ↓
Schedule Visit
    ↓
Choose Date
    ↓
Choose Time
    ↓
Send Request
    ↓
Agent Confirmation
The app can notify both parties when the appointment is confirmed, changed, or cancelled.
Step 18: Add Push Notifications
Notifications can bring users back to the app.
Useful notifications include:
- New property matching saved search
- Price changed
- Property visit confirmed
- Agent replied
- Listing approved
- Listing expired
- New inquiry received
Avoid sending too many notifications.
Users should ideally be able to control which alerts they receive.
Step 19: Add a Mortgage or EMI Calculator
For property buyers, a loan calculator can be useful.
Users could enter:
Property Price

Down Payment

Loan Amount

Interest Rate

Loan Term
The application can estimate the monthly payment.
Make it clear that such calculations are estimates rather than guaranteed lending offers.
Step 20: Build the Agent Dashboard
Agents need a central place to manage their work.
For example:
Agent Dashboard
│
├── My Properties
├── Add Property
├── Leads
├── Messages
├── Property Visits
├── Saved Drafts
└── Profile
If the platform targets professional brokers, additional lead-management functionality may be valuable.
Step 21: Build the Admin Dashboard
The admin panel controls the marketplace.
A typical structure could include:
Admin Dashboard
│
├── Users
├── Owners
├── Agents
├── Properties
├── Listings
├── Categories
├── Locations
├── Inquiries
├── Reports
├── Payments
├── Subscriptions
└── Settings
Administrators may need to:
- Approve listings
- Remove inappropriate listings
- Suspend users
- Manage agents
- Review reports
- Manage subscriptions
- Configure property categories
- Send notifications
A powerful admin dashboard becomes increasingly important as the platform grows.
Step 22: Decide How the Real Estate App Will Make Money
A real estate platform can use several business models.
Featured Listings
Property owners or agents pay to place properties higher in search results.
Agent Subscription
Agents pay monthly or yearly for access to professional tools.
Paid Listings
Users pay to publish a property.
Lead Generation
Agents pay for qualified inquiries or access to leads.
Advertising
Relevant businesses may advertise on the platform.
Premium Membership
Users receive additional functionality through a paid plan.
Your monetization model should be planned early because it can affect application architecture.
Step 23: Add Payments if Required
If your business model includes subscriptions or paid listings, you’ll need payment functionality.
For example:
Agent
   ↓
Choose Professional Plan
   ↓
Payment
   ↓
Subscription Activated
   ↓
Premium Features Enabled
The platform should also manage:
- Payment status
- Invoices
- Renewals
- Failed payments
- Refunds where applicable
- Subscription expiration
Use a suitable payment gateway for your target market.
Step 24: Protect User and Property Data
Security should be part of the development process from the beginning.
Important areas include:
- Secure authentication
- Authorization
- Secure APIs
- Encryption
- Session management
- Database security
- Input validation
- File-upload security
- Rate limiting
- Backups
- Monitoring
Property applications can also contain personal information about owners, agents, and users.
Collect only the information necessary for your service.
Step 25: Build for Android, iOS or Web
You can build:
Android Appor:
Android + iOSor:
Android + iOS + WebsiteFor many property businesses, having both an app and website can be valuable.
The website can help people discover listings through browsers and search engines, while the mobile application can provide a convenient experience for returning users.
Cross-platform technologies such as Flutter can also be considered when Android and iOS applications need to share much of their codebase.
Suggested Real Estate App Structure
A buyer or tenant application could look like:
Real Estate App
│
├── Home
├── Search
├── Map
├── Property Details
├── Favorites
├── Saved Searches
├── Messages
├── Visits
└── Profile
The owner or agent side could include:
Agent App
│
├── Dashboard
├── My Listings
├── Add Property
├── Leads
├── Messages
├── Visits
└── Profile
Meanwhile:
Admin Panel
│
├── Users
├── Agents
├── Properties
├── Listings
├── Leads
├── Payments
├── Reports
└── Settings
These systems communicate through the same backend.
Recommended Technology Stack
There is no single technology stack that is best for every property platform.
A practical stack might include:
| Component | Possible Technology |
|---|---|
| Mobile App | Flutter or React Native |
| Web App | React or Next.js |
| Backend | Node.js, Python, Java, .NET or another suitable backend |
| Database | PostgreSQL, MySQL or another suitable database |
| Maps | Google Maps or another mapping provider |
| Image Storage | Cloud object storage |
| Notifications | Firebase Cloud Messaging or platform notification services |
| Search | Database search or a dedicated search service as the platform grows |
| Hosting | AWS, Google Cloud, Azure or another suitable cloud platform |
Choose technology based on expected users, features, integrations, development team, and future scaling requirements.
Start with a Real Estate MVP
You don’t need to build every possible feature in version one.
A useful MVP could contain:
User Registration
        +
Property Listings
        +
Search and Filters
        +
Property Details
        +
Map
        +
Favorites
        +
Agent Contact
        +
Add Property
        +
Admin Panel
Launch this first.
Observe how buyers, tenants, owners, and agents use it.
Later, you can introduce:
Chat
+
Property Visits
+
Saved Search Alerts
+
Subscriptions
+
Mortgage Calculator
+
Virtual Tours
+
Advanced Analytics
+
AI Features
This can reduce initial development complexity while allowing the product to evolve based on real user behavior.
AI Features for a Real Estate App
AI can also be used where it provides genuine value.
For example:
Natural Language Property Search
Instead of adjusting many filters, a user could type:
Find me a three-bedroom apartment in Jaipur under ₹80 lakh with parking.
The application could translate the request into structured search filters.
Property Description Assistance
Agents could receive assistance creating listing descriptions from structured property information.
Property Recommendations
The platform could recommend listings based on saved properties, searches, and other appropriate signals.
Support Assistant
An AI assistant could answer common questions about using the platform or navigating listings.
AI should enhance the core property experience rather than being added simply because it is popular.
Common Real Estate App Development Mistakes
Avoid problems such as:
- Poor property search
- Too few filters
- Slow image loading
- Inaccurate location information
- Complicated listing forms
- Duplicate listings
- No listing moderation
- Poor mobile design
- No saved properties
- Weak agent communication
- No admin controls
- Weak security
- Building too many features before validating the product
A real estate platform succeeds when users can quickly discover relevant and trustworthy listings.
About Dotcube Technologies
Dotcube Technologies builds production-ready mobile and web applications for startups and businesses. Its services include mobile app development, web app development, SaaS product development, startup MVP development, AI-powered applications, and DevOps solutions.
For real estate businesses, a custom solution can be designed around property discovery, owners, agents, listings, leads, visits, subscriptions, and administrative workflows.
Real Estate App Development Services
Dotcube Technologies can help develop:
- Property listing mobile apps
- Real estate websites
- Android and iOS applications
- Flutter applications
- Property rental marketplaces
- Buyer and tenant apps
- Owner and agent dashboards
- Property management platforms
- Admin dashboards
- SaaS real estate platforms
- API integrations
- Map integrations
- Payment integrations
- AI-powered property features
- Custom backend systems
Build Your Real Estate App with Dotcube Technologies
Planning to build a property listing app, rental marketplace, real estate website, property management platform, or mobile app for your real estate business?
Dotcube Technologies can help take the project from initial requirements and UI/UX through development, integrations, deployment, and future improvements.
Your platform can include:
Property Listings
+
Advanced Search
+
Maps
+
Owners & Agents
+
Favorites
+
Property Inquiries
+
Visit Scheduling
+
Subscriptions
+
Payments
+
Admin Dashboard
The exact platform can be designed around your business model rather than forcing your company to work around generic real estate software.
Dotcube Technologies – Company Details
Company Name: Dotcube Technologies
Office Address:
T-6, Jeevan Vihar Complex, Near Mahalaxmi Jewellers, M.I. Road, Jaipur – 302001, Rajasthan, India
Email:
info@dotcubetechnologies.com
Phone / WhatsApp:
+91 7427081886
Working Hours:
24/7 — All Time Zones Across the Globe
Have a Real Estate App or Website Idea?
If you want to build a real estate app, property listing website, rental marketplace, SaaS platform, or another custom digital product, contact Dotcube Technologies and share your requirements.
Website: Dotcube Technologies
Contact / Start Your Project: Contact Dotcube Technologies
Tell us about your project, target users, required features, platforms, and business model to start planning your real estate solution.
Frequently Asked Questions
What features should a real estate app have?
A property listing app should generally include user accounts, property listings, photos, search, filters, maps, property details, favorites, agent or owner contact, and an admin dashboard.
Features such as saved searches, visit scheduling, chat, subscriptions, mortgage calculators, and virtual tours can be added according to the business model.
Can users add their own properties?
Yes.
Owners or agents can have a dashboard where they create and manage listings.
You can also require approval before a new property becomes publicly visible.
Can a real estate app show properties on a map?
Yes.
Map integration can display listings geographically and help users search within their preferred areas.
Can buyers contact agents through the app?
Yes.
The application can provide calling, messaging, inquiry forms, or in-app chat depending on your requirements.
Can users schedule property visits?
Yes.
A visit-booking feature can allow users to request a date and time, after which the agent or owner can confirm the appointment.
Can I monetize a property listing app?
Yes.
Common models include paid listings, featured properties, agent subscriptions, premium memberships, lead-generation fees, and advertising.
Should I build a website along with the app?
For many real estate businesses, this can be useful.
A website can help new users discover properties through the web, while the mobile application can provide a convenient experience for frequent users.
Can AI be added to a real estate app?
Yes.
AI can support natural-language property search, recommendations, listing-description assistance, customer support, and other suitable workflows.
Final Thoughts
Building a real estate app starts with one core experience:
Search
   ↓
Find Property
   ↓
View Details
   ↓
Save or Compare
   ↓
Contact Agent
   ↓
Schedule Visit
Make this process fast and simple before adding advanced features.
A strong first version should focus on accurate property listings, useful search filters, good photos, map-based discovery, favorites, easy agent contact, and a reliable admin system.
Once the platform has real users, features such as subscriptions, chat, mortgage calculators, virtual tours, advanced analytics, and AI-powered search can be introduced based on actual demand.
For startups and real estate businesses, starting with a focused MVP can be much more practical than trying to build a huge property marketplace from day one.